How To Create XVID Files For Playback On A PDA
This tutorial aims to show you how to use AutoGK to create compact XVID versions of your low-budget movies for a PDA with a 320x240 screen. It can easily be modified for other screen resolutions. In fact if you have any device that can play XVID then you can use this tutorial to create video files for it.
What better way to get your films seen than by providing a version for all those people with portable players who need something to watch on the train or during their lunch break!
During this tutorial I will assume you have plenty of available hard drive space. If you are using a DVD as a source you will require space to rip it to the hard drive plus space for the final output file.
Software Required:
To follow this guide you will require the following software to be installed on your PC :
- AutoGK v2.20 - Video conversion tool.
- DVDDecrypter v3.5.4.0 - DVD Ripper.
To play XVID files on your PocketPC PDA you will require a media player that supports XVID files. On my PocketPC 2003 SE based player I use The Core Pocket Media Player.
- The Core Pocket Media Player - The definitive PDA media player.
Step 1 - Choose Your Source
Decide what video source you are going to use. This can either be a DVD or miniDV. In my experience it doesn't really matter what you use but if you have the choice use miniDV. Using DVD would be preferable if you wished to make use of multiple audio streams or subtitles.
If you wish to use miniDV then jump to Step 3. If you wish to use DVD then continue to Step 2.
Step 2 - Rip The DVD
If you have choosen to use your home made DVD as a source then we need to rip it to your hard drive in a format that AutoGK will understand. To do this we will use DVDDecrypter. There are other DVD rippers available but AutoGK requires that you use DVDDecrypter because it creates additional files as it rips.
201 - Load DVDDecrypter.
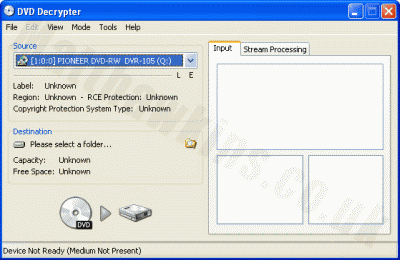
202 - Select 'Mode' from the menu bar and select the 'IFO I' option.
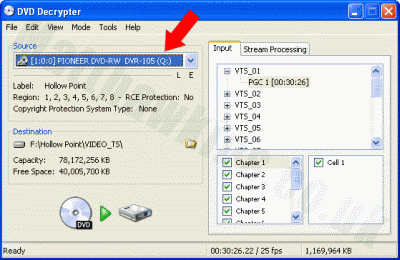
203 - Insert your DVD into your DVD drive and select the correct drive letter from the dropdown list labelled 'Source'.
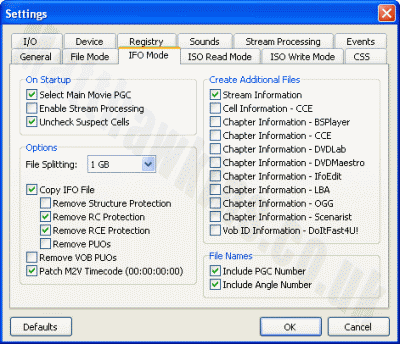
204 - Select 'Tools' from the menu bar and select 'Settings'. Select the 'IFO Mode' tab and ensure that the following checkboxes are ticked:
- Stream Information
- Include PGC Number
- Include Angle Number
205 - Set a suitable destination directory.
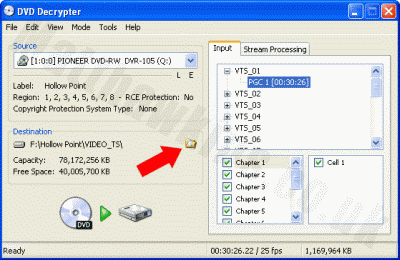
206 - Select the PGC item in the 'input' tab on the righthand side that corresponds to your movie.
Usually the runtime will indicate the correct PGC to select. By default DVDDecrypter selects the longest PGC it finds as this usually the main movie.
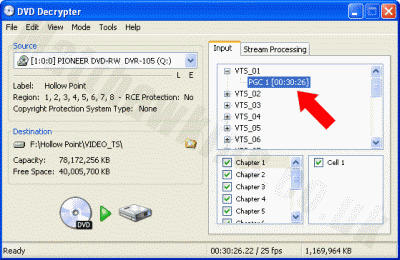
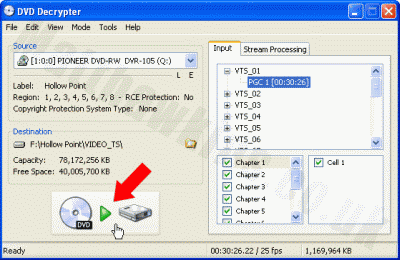
207 - Click the Decrypt button to begin the ripping process.
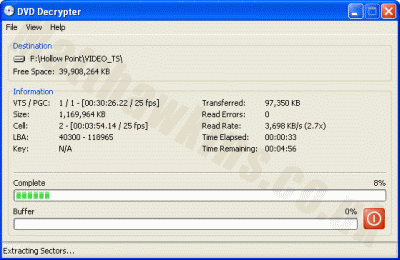
208 - Wait for the process to complete.
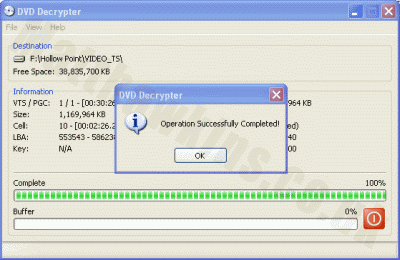
209 - When the process has been completed you will be presented with a message box that displays "Operation Successfully Completed!". Click OK.
210 - Close DVDDecrypter.
Step 3 - AutoGK
301 - Load AutoGK.
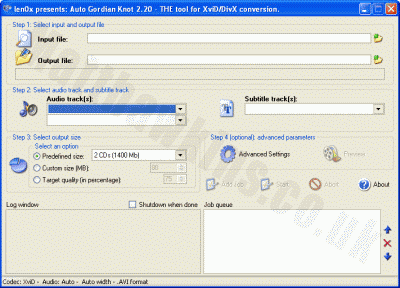
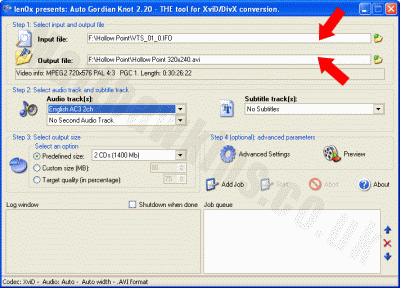
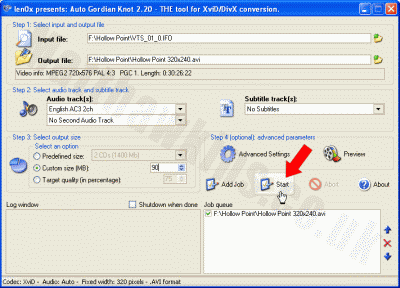
302 - Select the input file. This will either be an avi file if using miniDV or an ifo file if using ripped files produced in Step 2. Then set the output filename. In this example I am using a DVD source and setting the output filename to 'Hollow Point 320x240.avi'.
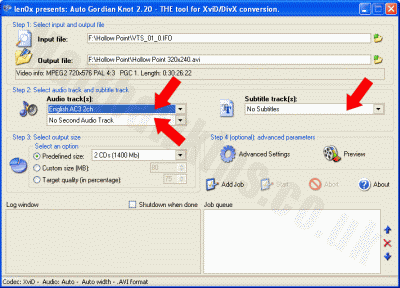
303 - Set the primary and secondary audio tracks. In most cases you will set the primary to the main audio source and set the secondary track to 'No Second Audio Track'. Then set the subtitle tracks.
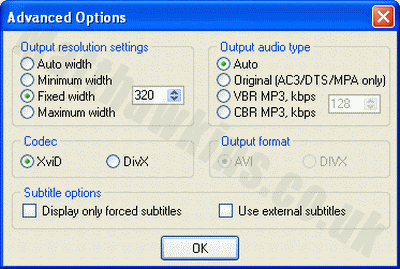
304 - Click the 'Advanced Settings' button and check the settings are OK. Note that we have specified a width, selected XVID as the codec to use and left the audio type to 'Auto'.
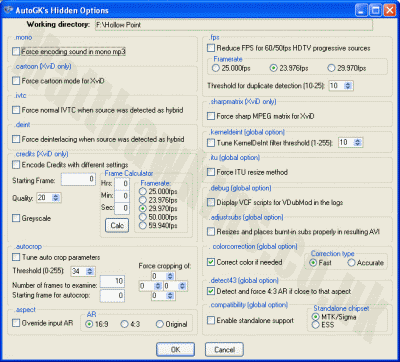
305 - Check the hidden settings are OK. Press CTRL-F9 to reveal the hidden settings.
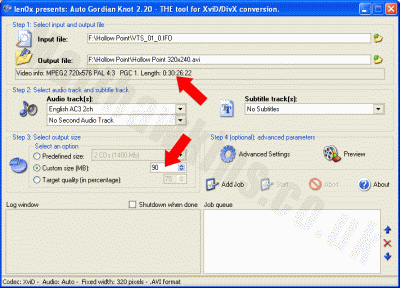
306 - Just below 'Output file' you will see some video information about your source. This should state the total runtime and in this example my runtime
is 30 minutes 26 seconds. Using this information I decided to encode the output with a target size of 3x30 = 90Mb. This size is entered into the 'Custom Size (MB)' setting.
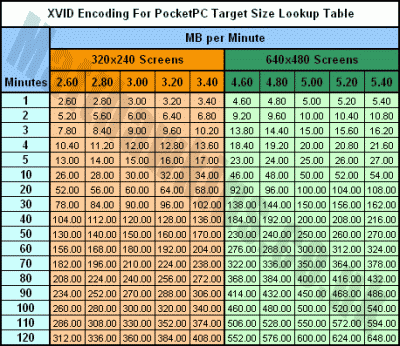
The tables below show the output file size for various length video clips. You can see that using 3MB per minute (3rd column) for a 30 minute video (8th row) will give a 90MB target size.
307 - Double check all settings.
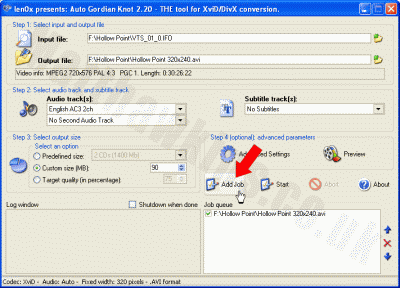
308 - Click the 'Add Job' button to add the job to the 'Job Queue'. To the right of the 'Job Queue' there are buttons to order and delete jobs.
309 - Adjust settings and add other jobs to the queue if required.
310 - Click the 'Start' button to begin processing the 'Job Queue'.
311 - Wait for the jobs to finish. The time you have to wait will depend on the speed of your processor. For example my 2500MHz PC will take 1 hour to process a 30 minute film.
Step 4 - Test
Check that the ouput file plays correctly in Windows. I tend to use Zoom Player Standard for playing XVID files as it supports subtitle formats. Things to double check:
- The aspect ratio is as expected
- The sound is correct
- The resolution is correct
- Any subtitles are as expected
- The total run time is correct
Additional Notes :
- You can change the output resolution if your PDA has a different size screen but you will need to allow more MB per minute. Remember that increasing the resolution by a factor of two actually increases the total number of pixels by a factor of four!
- In my experience I have found that using 3MB per minute of footage works well for 320x240 PDA files. The exact figure you use will depend on the source footage (a film with lots of motion will eat up more data than a documentary for example).
- I haven't created any 640x480 PDA files but the impression I get from other forums is that 5MB per minute of footage is a good starting point.
- As you may have noticed AutoGK lets you build a large job list before you start it encoding. This means you can add a number of jobs, encoding the same footage multiple times using different settings. I often use this technique to encode a piece of footage to different output sizes and then see which one gives the best size vs quality. If you leave the jobs processing overnight then this is an easy way to get a good result.
- You could encode to DivX rather than XVID but I prefer XVID because it is free and open source. Feel free to use DivX instead if you prefer.
- If you want to increase the audio quality then you can use the 'Advanced Settings'. However, remember that better audio will use up more space in your final output and this will reduce the space available for video.
Other AutoGK Resources:
The following links are other resources on using AutoGK for general video encoding. The AutoGK tutorial provides more detail on all the options. The AutoGK FAQ contains plenty of trouble-shooting information.
- AutoGK Homepage
- AutoGK FAQ
- AutoGK Forum
- AutoGK Tutorial
- AutoGK Tutorial


